Problem:
After performing a migration that includes transferring the domain name to the target server, Outlook cannot connect to the new server. The following error message is shown:
Outlook cannot log on. Verify you are connected to the network and are using the proper server and mailbox name. The Microsoft Exchange information service in your profile is missing required information. Modify your profile to ensure that you are using the correct Microsoft Exchange information service.
Solution:
This happens because the pre-migration settings of the Autodiscover service, which connects Outlook with Exchange, are still cached in the registry for the currently used Outlook profile. To resolve this, you need to create a new Outlook profile and set it as the default one. This can be done manually for each separate user or automatically for all users in your domain by using Group Policy or Microsoft Intune. Follow the links below to learn how to:
- Create a new Outlook profile for a single user
- Create a new Outlook profile for all users in the domain
- Create a new Outlook profile for all users or group(s) of users with Intune
How to create a new Outlook profile for a single user
- Close Outlook.
- Go to the Windows Control Panel and click Mail (or, if you’re using the Category view, first click User Accounts, and then click Mail).
- In the window that opens, click Show Profiles (Fig. 1.).
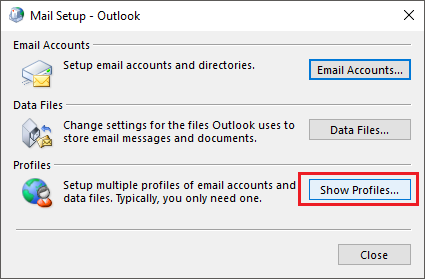
Fig. 1. Accessing Outlook profiles. - Click Add, and provide the name for the new Outlook profile (Fig. 2.). Click OK to proceed.
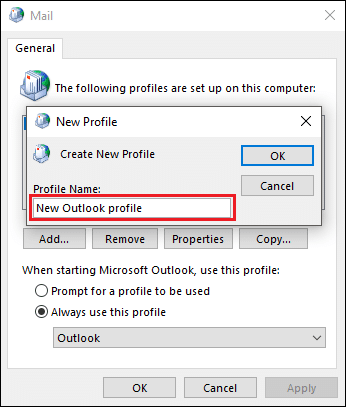
Fig. 2. Providing a name for the new Outlook profile. - Complete the wizard to add your email account and click Finish.
- Make sure the Always use this profile option is selected and choose your newly created profile from the drop-down menu (Fig. 3.).
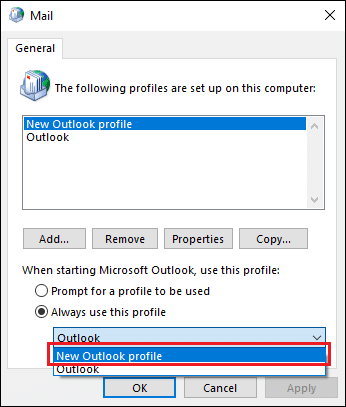
Fig. 3. Selecting the default Outlook profile. - Click OK to save changes.


Outlook should now open without any errors and connect to the correct Exchange server.
How to create a new Outlook profile for all users in the domain
A new Outlook profile can be created and set as a default one by using a simple script that adds new values to Windows registry. To bulk create new Outlook profiles for all your users, you can run this script on multiple computers via Group Policy.
Important
In this scenario, the script will be executed as a user logon script. However, a Group Policy object (GPO) can also be configured to run user logoff or computer startup and shutdown scripts.
Follow the links below to:
- create a file containing a script that will create a new Outlook profile
- create a new GPO that will execute that script.
Creating a file containing a script to create a new Outlook profile
- Open Notepad (or any text editor) and paste the following text (depending on which Outlook version you use):
- Outlook 2010
reg add "HKCUSoftwareMicrosoftWindows NTCurrentVersionWindows Messaging SubsystemProfiles<name>"
reg add "HKCUSoftwareMicrosoftWindows NTCurrentVersionWindows Messaging SubsystemProfiles" /v DefaultProfile /t REG_SZ /d "<name>" /F
reg add "HKCUSoftwareMicrosoftExchangeClientOptions" /v PickLogonProfile /t REG_DWORD /d "0" /f
- Outlook 2013
reg add HKCUSoftwareMicrosoftOffice15.0OutlookProfiles<name>
reg add "HKCUSoftwareMicrosoftOffice15.0Outlook" /v DefaultProfile /t REG_SZ /d "<name>" /F
- Outlook 2016 and 2019
reg add HKCUSoftwareMicrosoftOffice16.0OutlookProfiles<name>
reg add "HKCUSoftwareMicrosoftOffice16.0Outlook" /v DefaultProfile /t REG_SZ /d "<name>" /F
Where instead of <name> provide the name for the new Outlook profile.
- Outlook 2010
- Save the file as a BAT file.
- Copy the file to a network location accessible for all users in the domain (e.g. %logonserver%netlogon).
Warning
Make sure that each user has appropriate permissions to access this location.
Creating a GPO executing the script when a user logs in to a workstation
- Log in to your Windows Server domain controller (DC).
- Open Server Manager and select Tools > Group Policy Management.
Tip
If it’s not there, you need to install this feature first. In Server Manager, select Manage > Add Roles and Features and follow the wizard instructions. Just remember to select the Group Policy Management feature in the Features step (Fig. 4.).
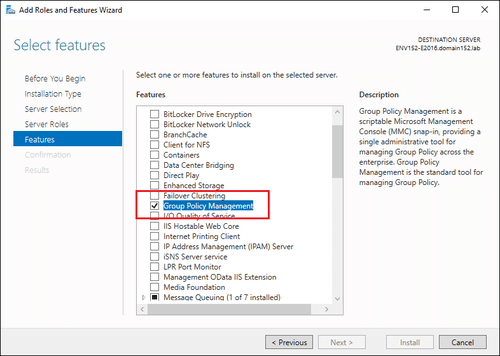
Fig. 4. Installing the Group Policy Management console. - In the Group Policy Management console, find your domain on the left side navigation menu, right-click it and select Create a GPO in this domain, and Link it here (Fig. 5.).
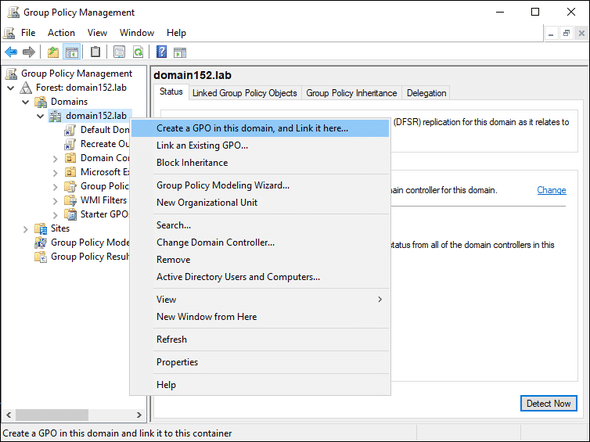
Fig. 5. Creating a new GPO. - Provide the name of the new GPO and click OK.
- Navigate to the Group Policy Objects container on the menu, find your newly created GPO, right-click it and select Edit. The Group Policy Management Editor will open.
- Go to User Configuration > Policies > Windows Settings > Scripts (Logon/Logoff) and double-click Logon (Fig. 6.).
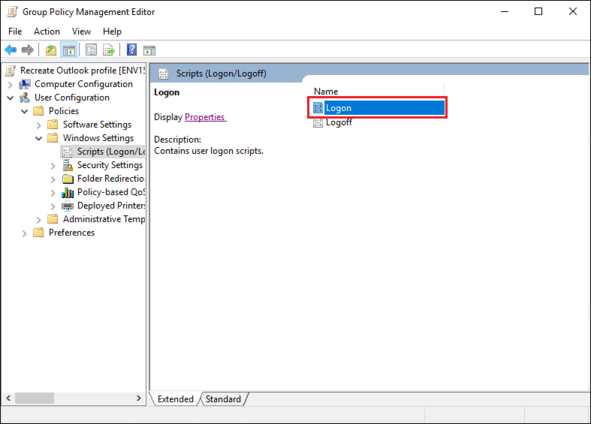
Fig. 6. Adding a new logon script. - In the Logon Properties window, click Add, and then click Browse and select the BAT file created in the section above (Fig. 7.).

Fig. 7. Selecting the appropriate script file. - Click OK two times to save the change.


You can now close the Group Policy Management console. The script will be executed for each user when they log in to their workstations. When they try to open Outlook, the Outlook startup wizard will be shown (Fig. 8.).

Fig. 8. The Outlook startup wizard.
The Autodiscover feature should no longer have a problem connecting to the appropriate on-prem Exchange server or Office 365.