Whether you call it USB stick, flash drive, pen drive, jump drive, or thumb drive, there are several ways to turn write-protection on and off for both your device and its contents. The approach that works best varies from user to user based on their needs. To proceed, select a method from the list below, read the description, and follow the instructions.
Write-protection switch
Some USB flash drives have a write-protection switch on the side or bottom. The write-protection switch is useful for keeping the contents of your drive safe from malware when you need to view them on a public computer. If your device has this switch, move it to the “Lock” position. This action effectively sets all files, and the device itself, to read-only mode.
Using DiskPart to change read-only settings
You can use the Windows DiskPart command line utility to enable or disable read-only mode on your USB flash drive.
- Press Win+R to open the Run box. Type diskpart and press Enter.
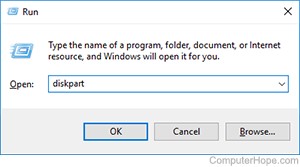
- If you receive a User Account Control prompt asking you for permission to continue, click Yes.
- At the DISKPART> prompt, type list disk and press Enter.
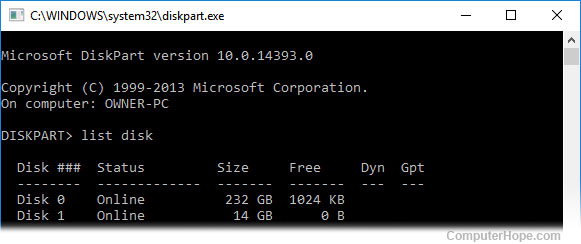
From the size of the disk, you should be able to figure out which one is your USB flash drive. In this example, we know that Disk 1 is our USB flash drive because its size is listed as 14 GB.
- Select your USB flash drive with the select disk command. In this example, we want to work with disk 1, so the command is select disk 1.

- You can list the attributes of the disk with the command attributes disk.

- To clear the read-only attribute (making the disk writable), use the command attributes disk clear readonly.

Or, to set the read-only attribute (making the flash disk write-protected), use the command attributes disk set readonly.

- When you are finished, type exit to quit the program.
Change security permissions in flash drive properties
If using diskpart, as detailed in the section above, does not work to clear the read-only attribute of a USB flash drive, the security permissions may need to be changed. It is possible that security permissions have been set so that all users only have Read permissions to files on the flash drive.
To check if security permissions need to be changed, follow the steps below.
- Open My Computer or File Explorer.
- Find the USB flash drive in the list of drives connected to the computer.
- Right-click on the flash drive icon and select Properties in the pop-up menu.
- On the Properties window, click the Security tab.
- Click the Edit button below the Group or user names section.
- In the Permissions window, click the Everyone entry, if not already selected. In the Permissions for Everyone section, make sure the Allow checkbox is checked for the Modify entry. If it is not checked, check the box.
- Click the OK button on the Permissions and Properties window to save the security permissions change.
If you want to set the flash drive to read-only for all users, in step 6, uncheck all boxes in the Allow column, except for the Read entry.